")
Table of Contents
- Science Behind Rust
- Milwaukee Right Angle Die Grinder Method
- The Milwaukee 4-½” Grinder Method
- Budget and Environmentally Friendly Solution: Vinegar Method
- Additional Tips
- How to Safely Store Tools to Prevent Rust
- Ready to Breathe New Life Into Your Rusty Tools
All tool users, especially those of us who enjoy working outside, have rust as a frequent problem. Tools may become unusable or irreparably damaged. Fortunately, vinegar is an all-natural and efficient remedy for this issue! Your tools do not need to be thrown away because they have some rust on them. Knowing how to get rid of rust on metal tools makes it possible to have them in working condition for a longer period.
Have you ever wondered how you can extend the life of your tools? When paired with the strength of a Milwaukee Grinder Milwaukee Right Angle Die Grinder with a 3M Bristle Disc, these straightforward tools can do wonders for our rusted equipment. What if you could restore your tools to their former glory with just a few simple steps? I will walk you through the steps of restoring your rusty tools using a few different methods.
– “Take care of your tools and they will take care of you.”
– Proverb

The Science Behind Rust
Rust is a type of corrosion that forms when iron or steel reacts with oxygen and moisture. This chemical reaction produces iron oxide which we call rust! Have you ever wondered why some metals rust faster than others? The process of rusting can be broken down into a few key steps:
Understanding Rust Formation
Exposure to oxygen and moisture:
When Iron or steel tools are exposed to air and moisture, the surface of the metal begins to react with oxygen. This is particularly common in humid areas or when tools are left outside or stored poorly.

Formation of rust:
As the iron oxide forms, it creates that annoying flaky, reddish-brown layer on the tool’s surface. This layer is porous and can easily flake off, exposing more metal to the elements and continuing the cycle of rusting.
Factors that speed up rusting:
- Humidity: Elevated levels of humidity increase the amount of moisture in the air, speeding up the rusting process.
- Salt: Salt water or salty air (If you are located near the ocean) can significantly speed up this process.
- Temperature: Higher temperatures can increase electrochemical reactions, making the rust form.
A group of experts called NACE International says that rusting costs the world a huge amount of money every year. This includes things like tools, buildings falling apart, cars needing repairs, and problems in factories. Rust is a big part of this problem.
At J&R Advanced Tool Repair, we are dedicated to helping you tackle your home improvement challenges. We’re confident these rust removal methods will get your tools back in top shape. Want to learn more about us? Or how to purchase the necessary tools? Click here.
3 Best Methods Using Tools & Home Remedies
Are you ready to conquer rust?
Let’s dive into the world of rust removal! We’ll start by examining the power of specialized tools to tackle stubborn rust. Then, we will explore a classic home remedy – the vinegar method – for a more hands-on approach.
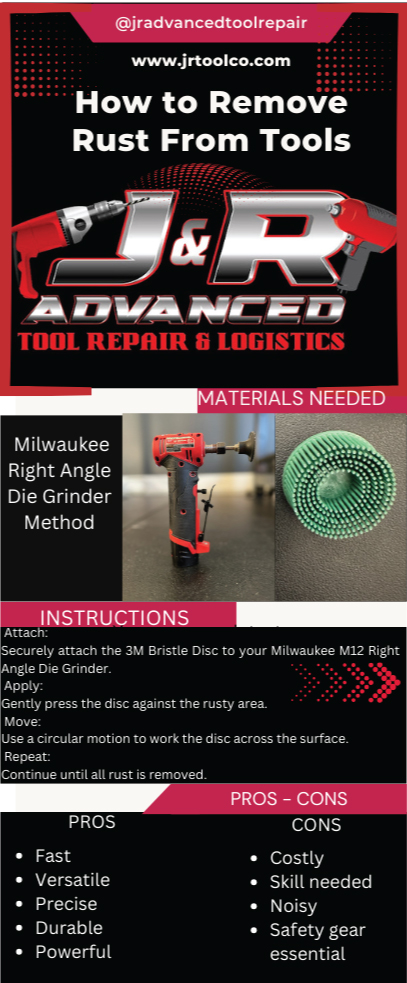
Milwaukee Right Angle Die Grinder Method
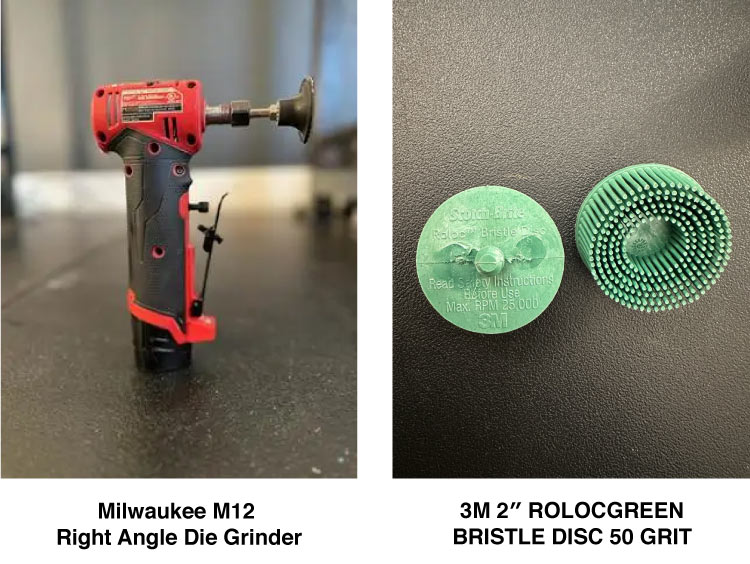
Milwaukee M12 Right Angle Die Grinder ↗
3M 2″ ROLOC GREEN BRISTLE DISC 50 GRIT ↗
Instructions:
- Attach your 3M Bristle Disc to your Milwaukee M12 Right Angle Die Grinder.
- Begin by applying gentle pressure to the rusty areas.
- Move in a circular motion, and continue until rust is completely removed.
Pros:
- It quickly removes rust, saving you a lot of time.
- It can be used with different attachments like the 3M Bristle Disc to handle different levels of rust.
- Offers better control for detailed work, allowing you to target specific areas.
- Milwaukee tools are known for their durability
Cons:
- Milwaukee tools can be more expensive compared to at-home remedies like vinegar.
- Using a die grinder effectively requires some level of skill and experience.
- The Grinder can be noisy.
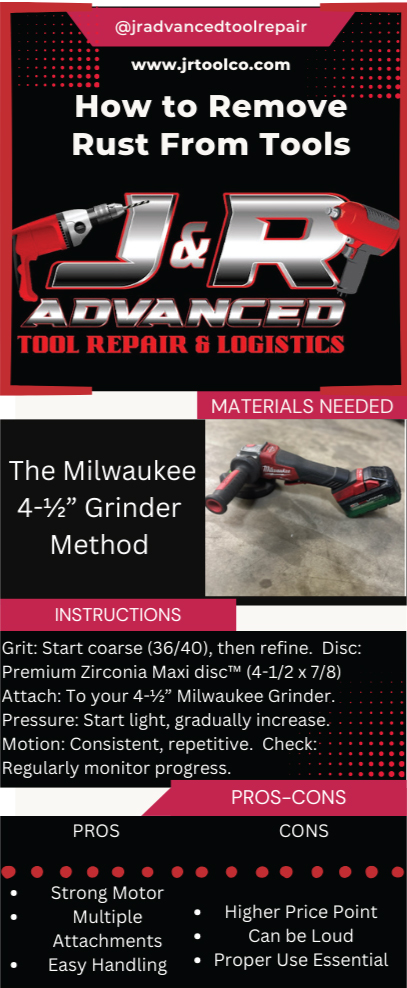
The Milwaukee 4-½” Grinder Method

Shop Now: M18 Fuel 4-½”/5” Grinder ↗
Using the Milwaukee Grinder:
- Remember to select the right coarse grit flap disc for the task you wish to perform. For removal of thick rust, you should ideally start with a coarse grit such as 36 or 40 grit and then advance to finer grits for a more polished result. For our tutorial, we used the Premium Zirconia Maxidisc™ Flap Disc 4-1/2 x 7/8 Z60 T-27 MAX4560Z
- Attach the Flap Disc to your 4-½” Milwaukee Grinder.
- It is recommended to start the process with minimal pressure and gradually increase it to fit your needs. The movement should be in a repetitive manner such as following the shape of your tool. Continuously check the tool to remove any lost rust, dirt or debris, and repeat removing them until the required rust removal has been met.
Pros:
- The Milwaukee 4 1/2″ grinder is known for its strong motor.
- It can be used with various attachments.
- The lightweight build makes it easy to handle.
Cons:
- Milwaukee tools can be on the pricier side.
- The grinder can be noisy.
- As with any power tool, there’s a risk of injury if not used properly.
Budget and Environmentally Friendly Solution: Vinegar Method
Now, let’s dive into a budget-friendly, as well as an environmentally friendly solution for rusty tools.
Have you ever wondered if a kitchen staple like vinegar could truly combat the tough challenge of rust? This simple method is surprisingly effective. Let’s get started:
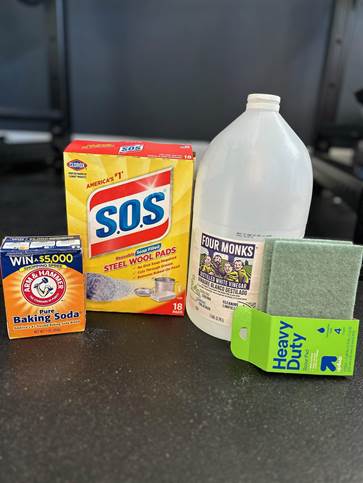
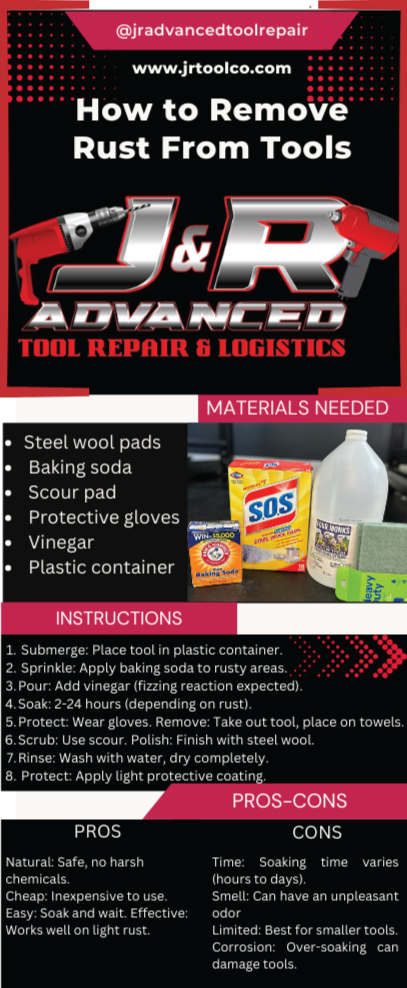
Materials needed:
- Steel wool pads
- Baking soda
- Scour pad
- Protective gloves
- Vinegar
- Plastic container
Instructions:
- Put your tool into the plastic container of your choice.
- Sprinkle the baking soda over your rusty areas.
- Pour vinegar onto the tool, you will see a fizzing reaction. Make sure the tool is fully submerged in the vinegar.
- Depending on rust severity soak for 2-24 hours
- Put on your protective gloves.
- Remove the tool from the container and place it on shop towels.
- Scrub with the scour to remove the rust.
- Use the steel wool pad to finish removing the rust.
- Rinse with water and dry thoroughly.
- Lightly coat the metal of your tools with a safe protective coating.
Pros:
- Vinegar is natural, making it safe to use without harmful chemicals.
- It’s a cheaper method since vinegar is inexpensive.
- The process is pretty easy. Just soak the rusty tools in vinegar, and it does the work for you.
- Vinegar is good at breaking down rust, especially for lighter rusting.
Cons:
- The soaking process can take several hours to a few days, depending on the severity of the rust.
- Vinegar might have an unpleasant smell.
- This method is better for smaller tools that can be easily soaked.
- If tools are left in vinegar for too long, they can start to corrode.
“Quality is not an act, it is a habit.” – Aristotle
Additional Tips:
- Always wear safety glasses or a face shield. Flying debris can cause serious eye injuries.
- If you work in a dusty environment, wear a dust mask to prevent inhaling metal particles.
- Wear sturdy work gloves to protect your hands.
- Wear long sleeves, long pants, and close-toe shoes.
- For stubborn rust, add a generous amount of salt to the vinegar. The salt will increase the acidity and help break down the rust more effectively.
- Baking soda paste can also be an effective rust remover. Mix baking soda with a little water to create a thick paste. Apply the paste to the rusted area. Let the paste sit on rust for 2-24 hours. Then use your steel wool pad or scour scrubber to scrub away your rust.
How to Safely Store Tools to Prevent Rust
Now that we’ve explored effective rust removal methods, let’s shift our focus to prevention. Tired of constantly battling rust? Here are some ways we can store and prevent rust.
- Always clean your tools after using them to remove any dirt, moisture or chemicals that might cause rust.
- Make sure the tools are completely dry before storing them. Like we talked about earlier, moisture is the main reason for rusting.
- Use a protective coating, such as machine oil, or WD-40, on a metal surface to create a barrier against moisture.
- Keep your tools in a dry, well-ventilated area. Avoid storing them in damp or humid locations.
- Store tools in a tool chest or cabinet with an anti-rust liner or silica gel packs to absorb moisture. (Make sure you keep the silica gel packs away from children)
- Hanging tools on a pegboard can keep them off potentially damp surfaces and air can easily circulate around them.
- Consider using rust inhibitor products or vapor corrosion inhibitors (VCI) to protect tools in storage.
“A place for everything, and everything in its place.” – Benjamin Franklin
Ready to Breathe New Life Into Your Rusty Tools?
These effective methods can easily restore them to their former glory. Choose the method that best fits your needs and get started today!
Still have questions? Our expert team is here to help. Call us at 559-378-3474 or contact us for personalized guidance and support.
